Sales, tickets, reports, query sale data
After Astral has been setup in your organization, you may login using the URL provided to you by the person who set it up. As soon as you access the URL in your browser, you will see the login screen. After you enter your credendials, you will be taken to the Admin dashboard, regardless of your account type.
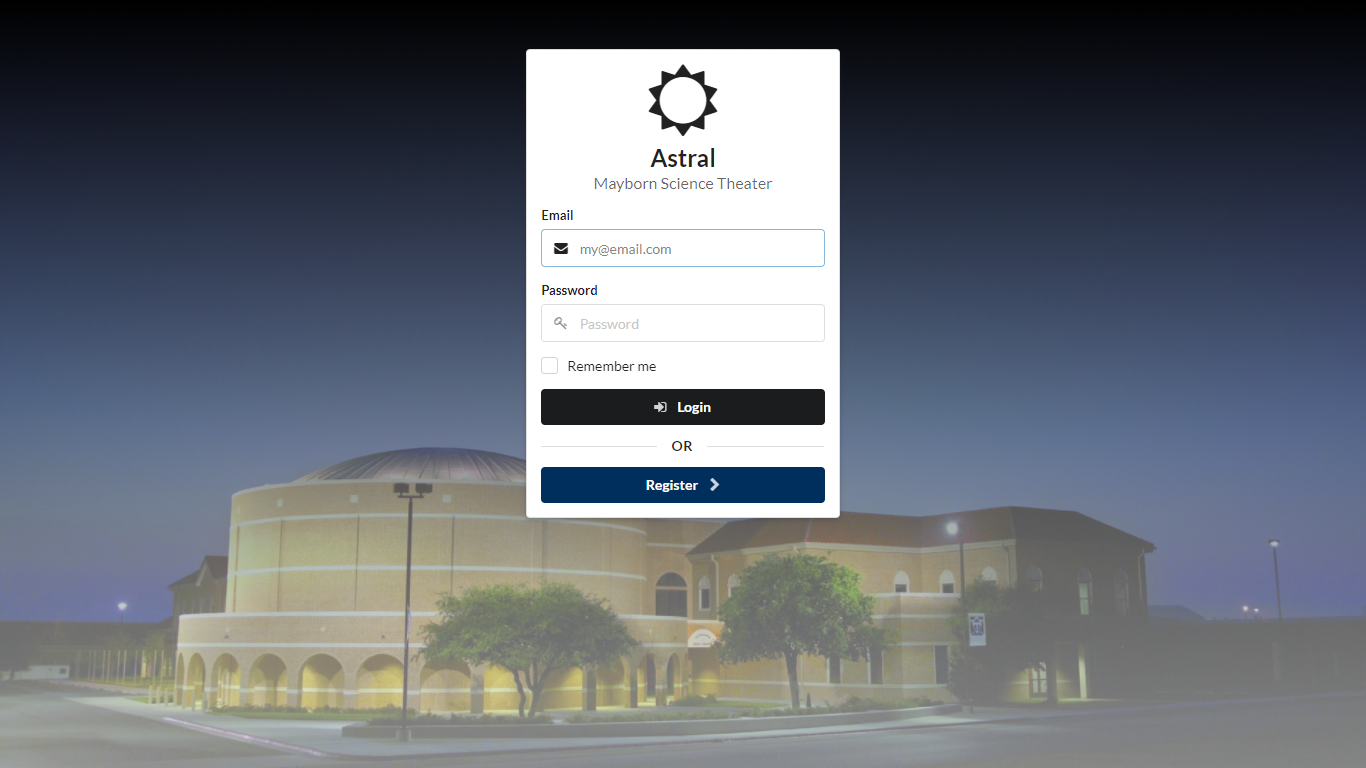
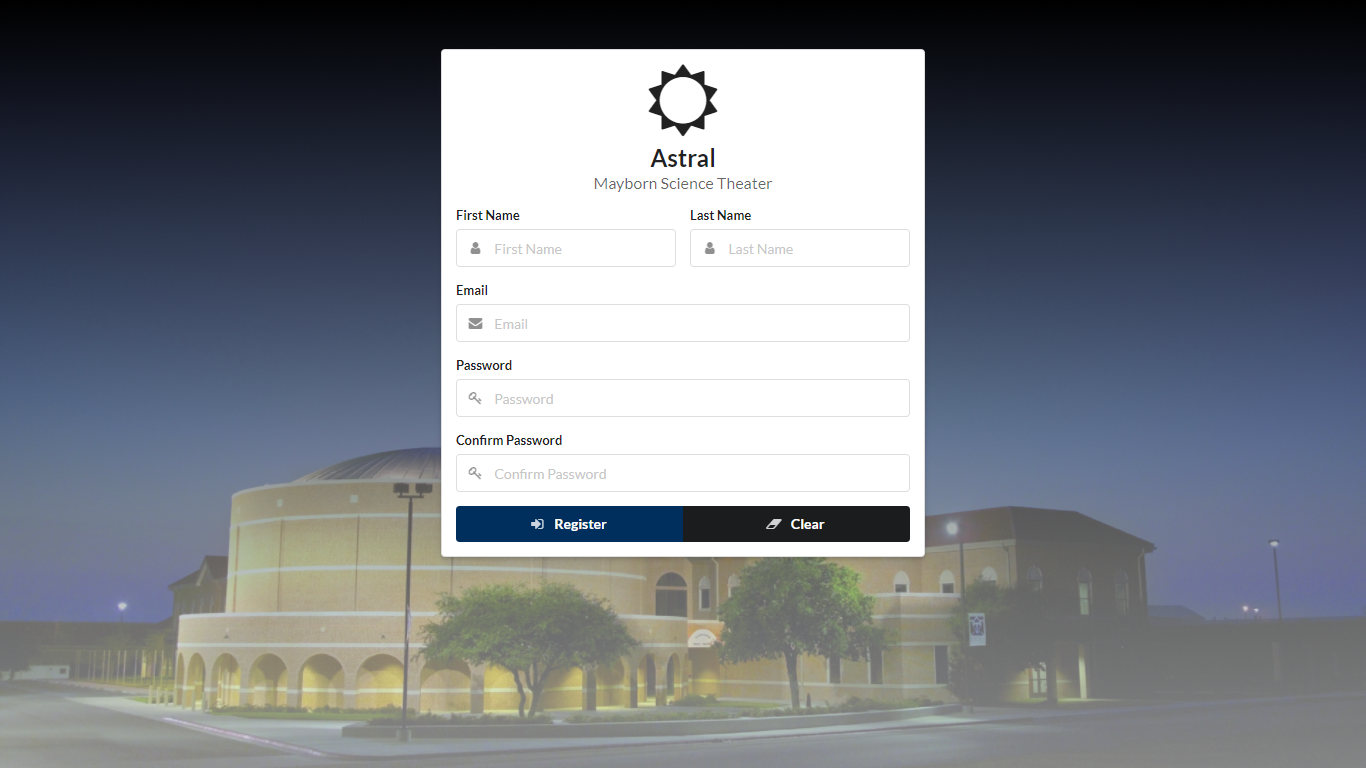
If you don’t have an account, you should create one by clicking in Register. Fill out and submit the form and you should be good to go.
After you create and account, use your credentials to log in.
Upon login, you will be taken to Admin Dashboard. From there, in order to access Cashier, you have two options:
Cashier will always be open on a new tab.
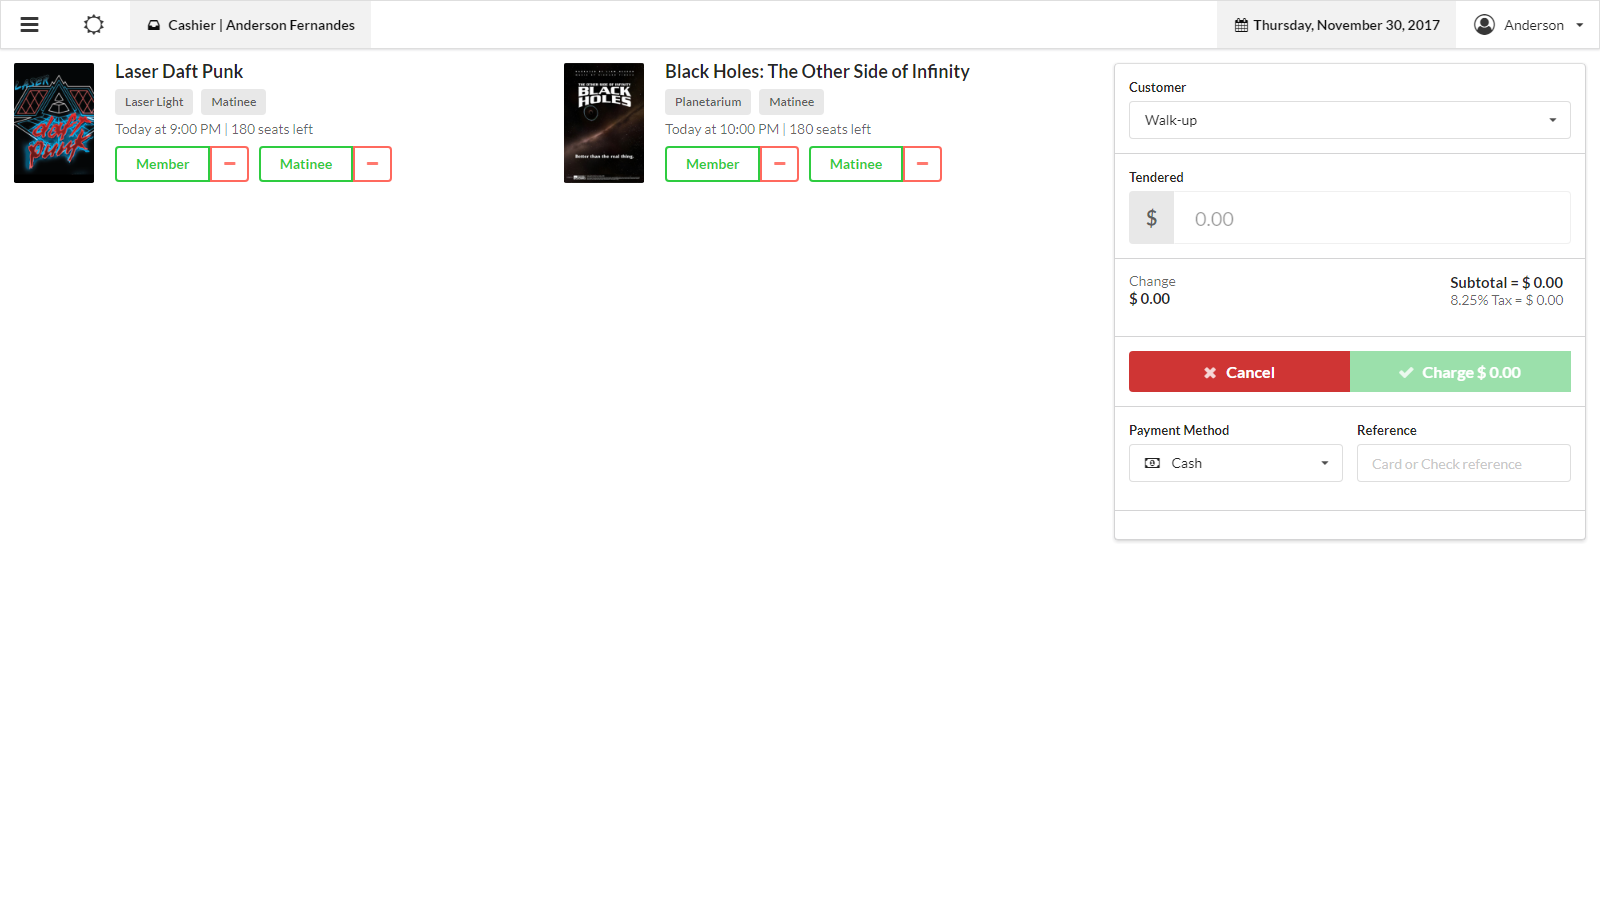
Cashier is the main screen in Cashier. What you will see there depends on wether nor not you have events set up for today. If your account allows, you need to add events. Otherwise, contact a supervisor or someone with Admin access and tell them to add the Event(s) in Admin.
Events will be ordered according to their start time. Events starting in the morning will be shown before events starting in the afternoon or evening.
Each Show cover and data close to it represent data for that event.
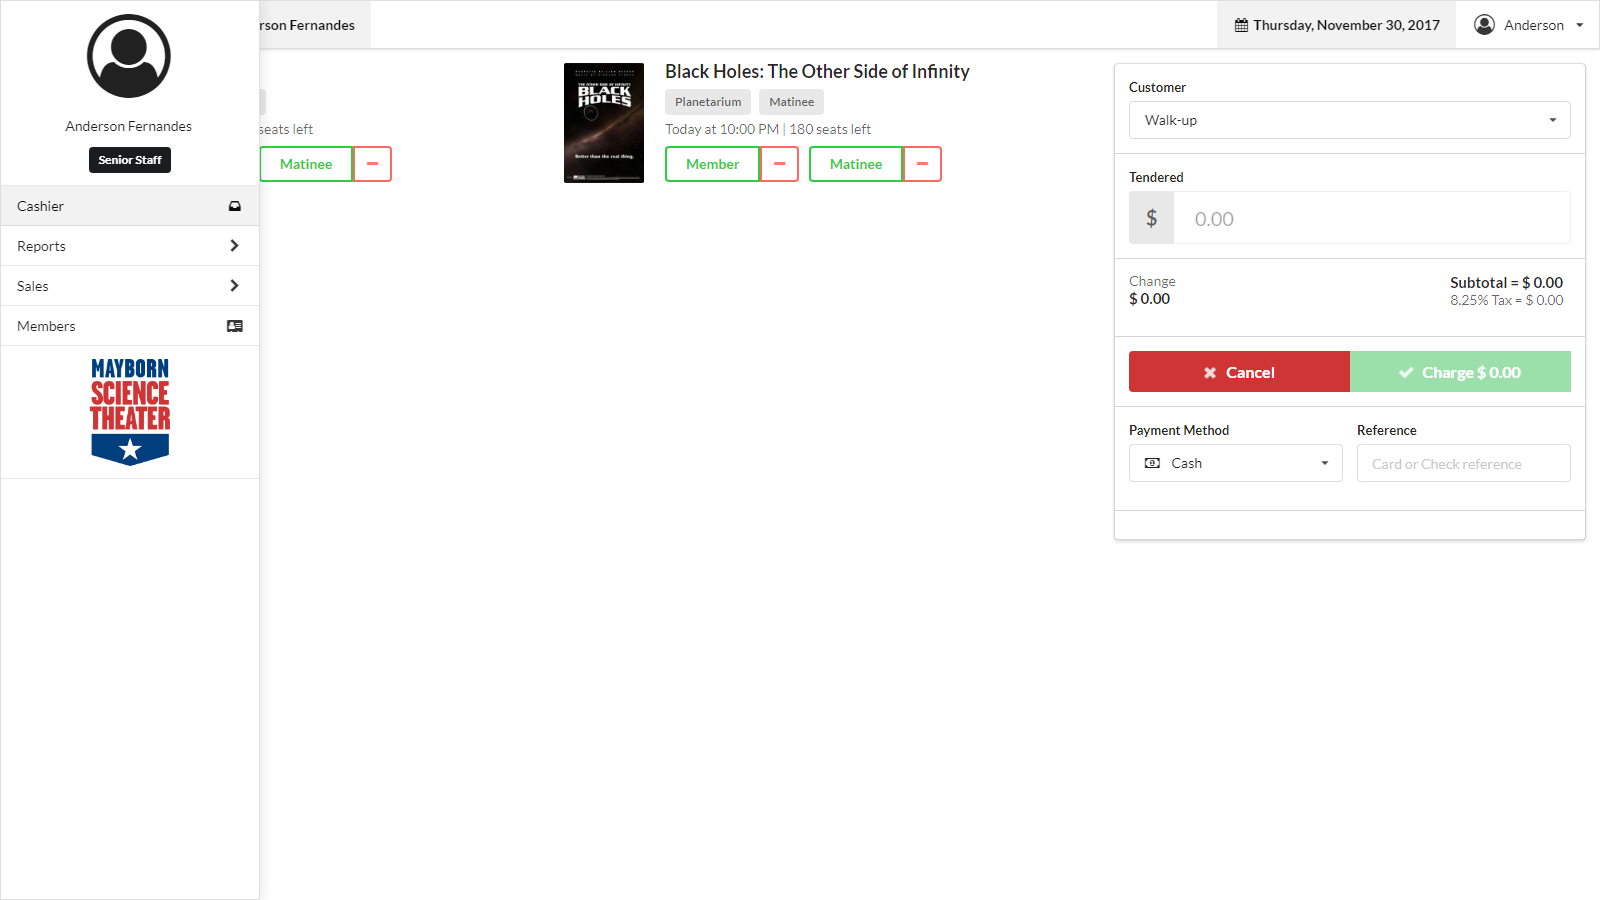
The sidebar gives you access to everything you need within Cashier. It is just like the Start Menu on Microsoft Windows. Clicking on the Menu button on the top left corner of the screen will make the Sidebar appear from any screen, except Reports and My Account.
Only the appropriate tickets will be available for sale in a particular Event. You should not see, for example, a Special Event ticket available in a Matinee.
In order to sell, for example, two matinee tickets for an Event happening at a particular time, click (or tap if you are in a touchscreen) on the green button that has the ticket type twice. Each click/tap adds one ticket to the sale. To remove tickets, click/tap the red minus button corresponding to a particular ticket. Select the Customer you are selling to, the tendered amount in the Tendered field, select the payment method in the Payment Method dropdown, enter a Reference for the payment in the Reference field if necessary and click/tap the green Charge button.
Cashier will grey out the Tendered field and the Charge button if you have no tickets to sell.
If you did everything correctly, you will see a message of success for the sale. Otherwise, you may have to start over.
In All Sales, you can see all sales that are pending. For example, if a School Group is coming for a visit, their Sale should be listed in this screen.
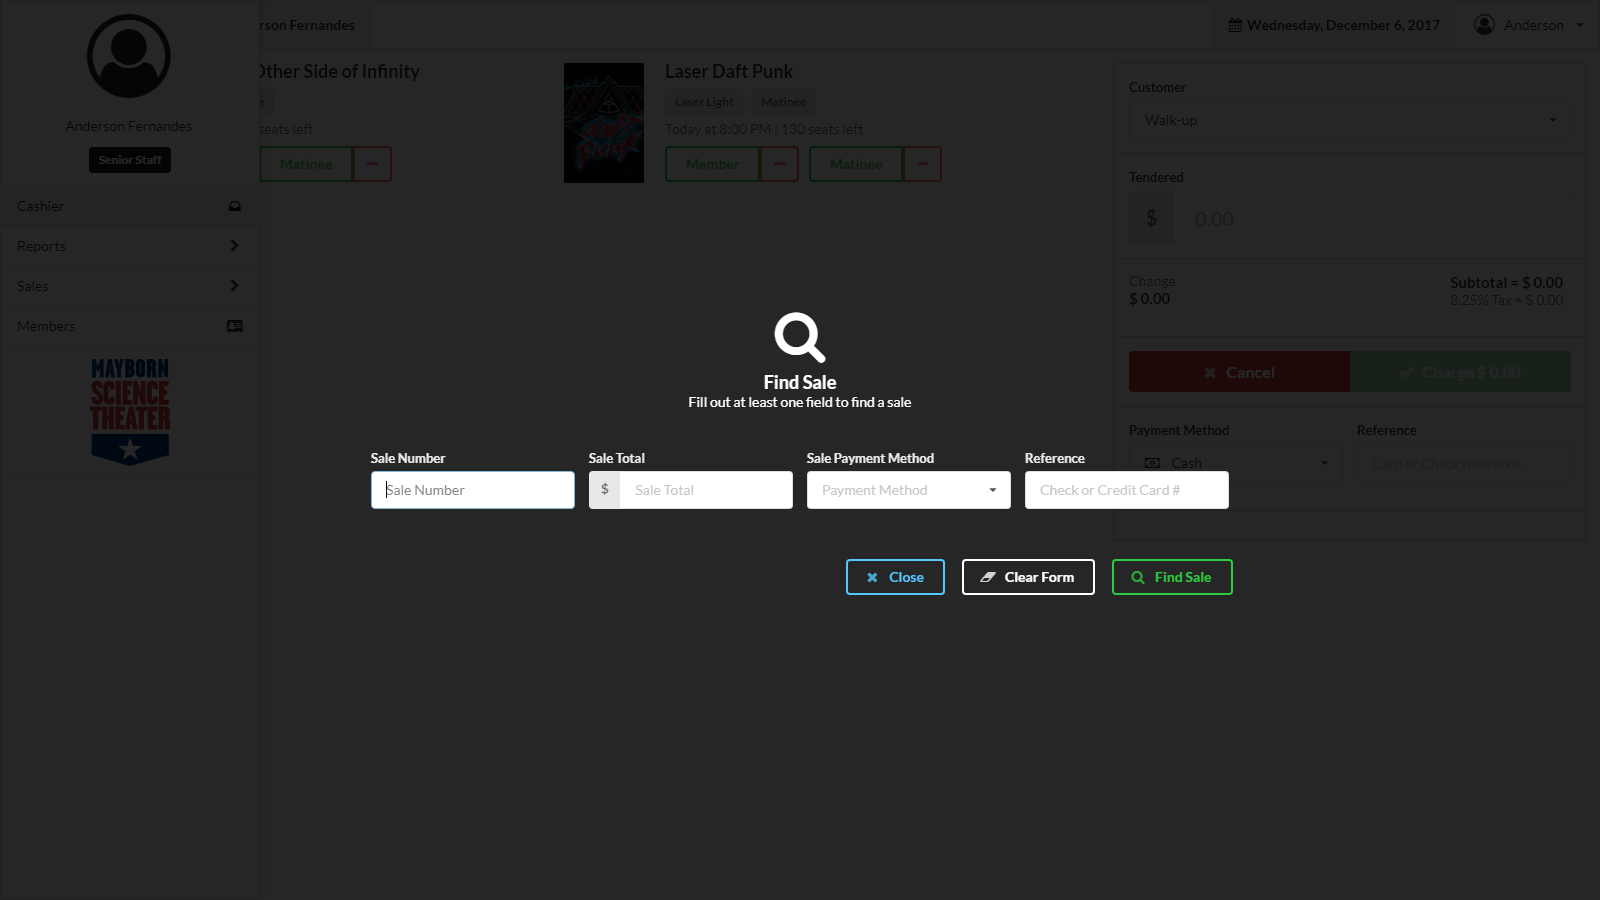
You can query a search by entering at least one piece of information about it. Sending a blank form will not display any results. Find Sale is located in the Sidebar Menu.
Enter whatever you know about the sale and click the green Find Sale button. If you don’t know much about the sale you are looking for, start by entering a Sale Total that you can obtain from your credit card machine report or by trying to guess the Sale Payment Method.
A Refund does not delete or cancel a sale. It actually marks it as a refund.
In order to do a Refund, you need to find the sale using the Sidebar Menu item Find Sale. Read Finding a Sale for more information.
After you find the sale you want to refund in the Find Sale results, click on it and you will be taken to the Sale information page. At the top right corner of that screen, there will be a red Refund button. Enter the sale information to confirm that you know what you are doing and not doing it by accident and click Refund.
If you did everything correctly, the Sale will be marked as refunded and the Sale information page will have red letters.
Cashier has basic payment reporting functions to help in your conciliation process. As of release 1.0-alpha1, there are two reports: Closeout Report and Transaction Detail Report.
This reports breaks down payments made in cash, card and check. The payments displayed in this report are only the ones taken by the cashier logged in cashier asking for it.
This reports shows a table in which every line is a payment. The payments displayed in this report are only the ones taken by the cashier logged in cashier asking for it.
Click on your name on the top right corner of the screen and click in “Logout”.
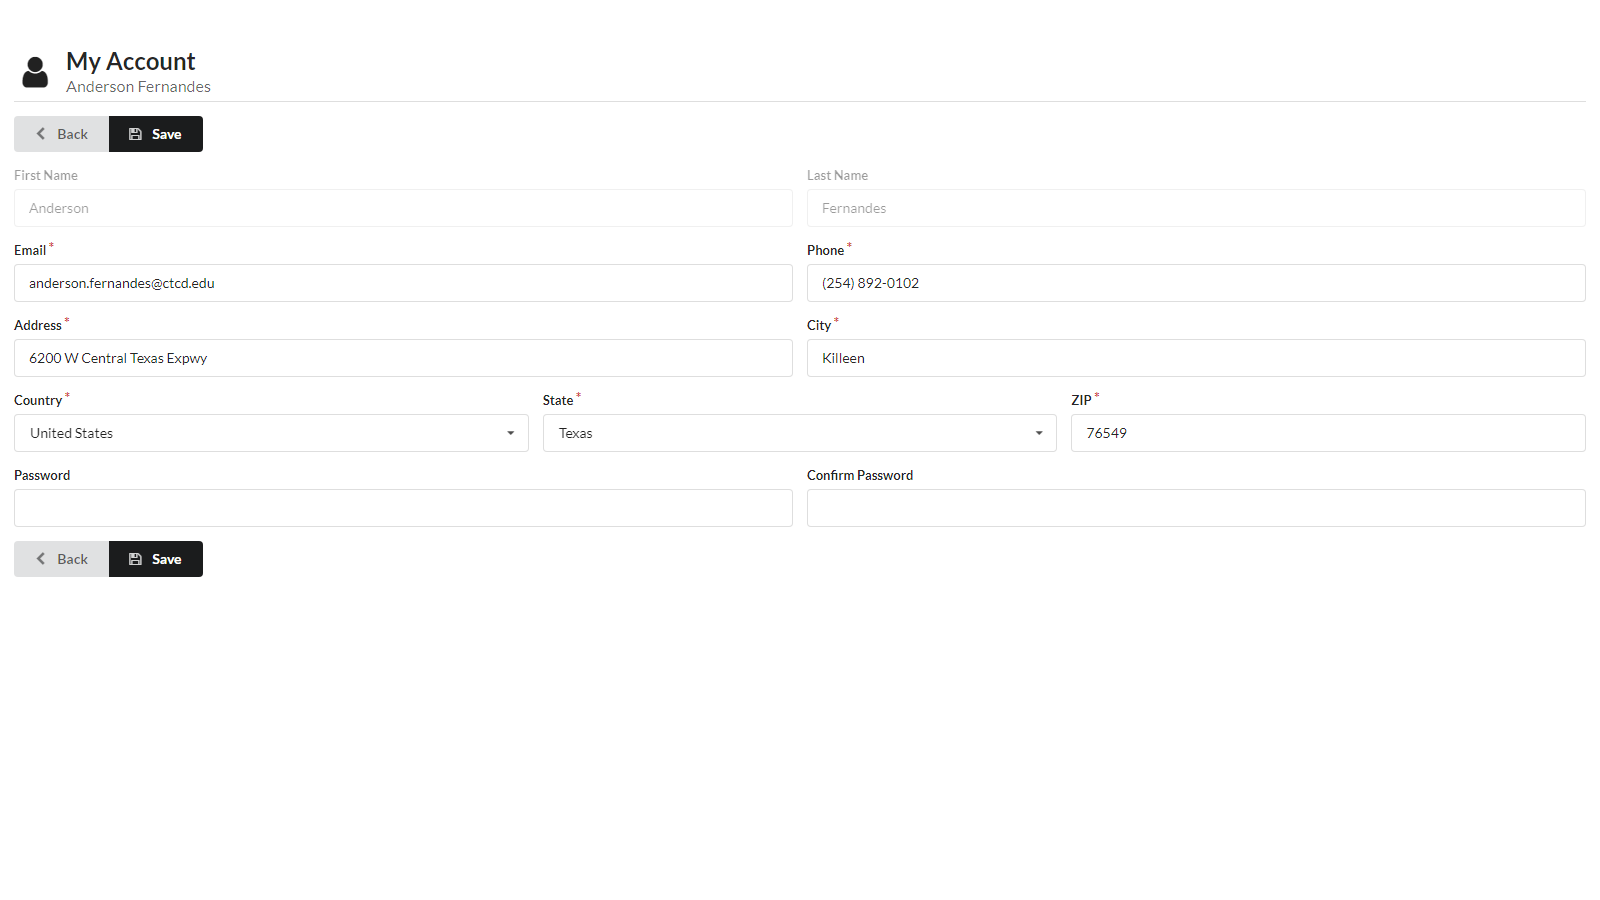
This is where you go to change your account information if you don’t type anything in the password fields, your password won’t change. Click save if changes have been made or click back to return to Dashboard.
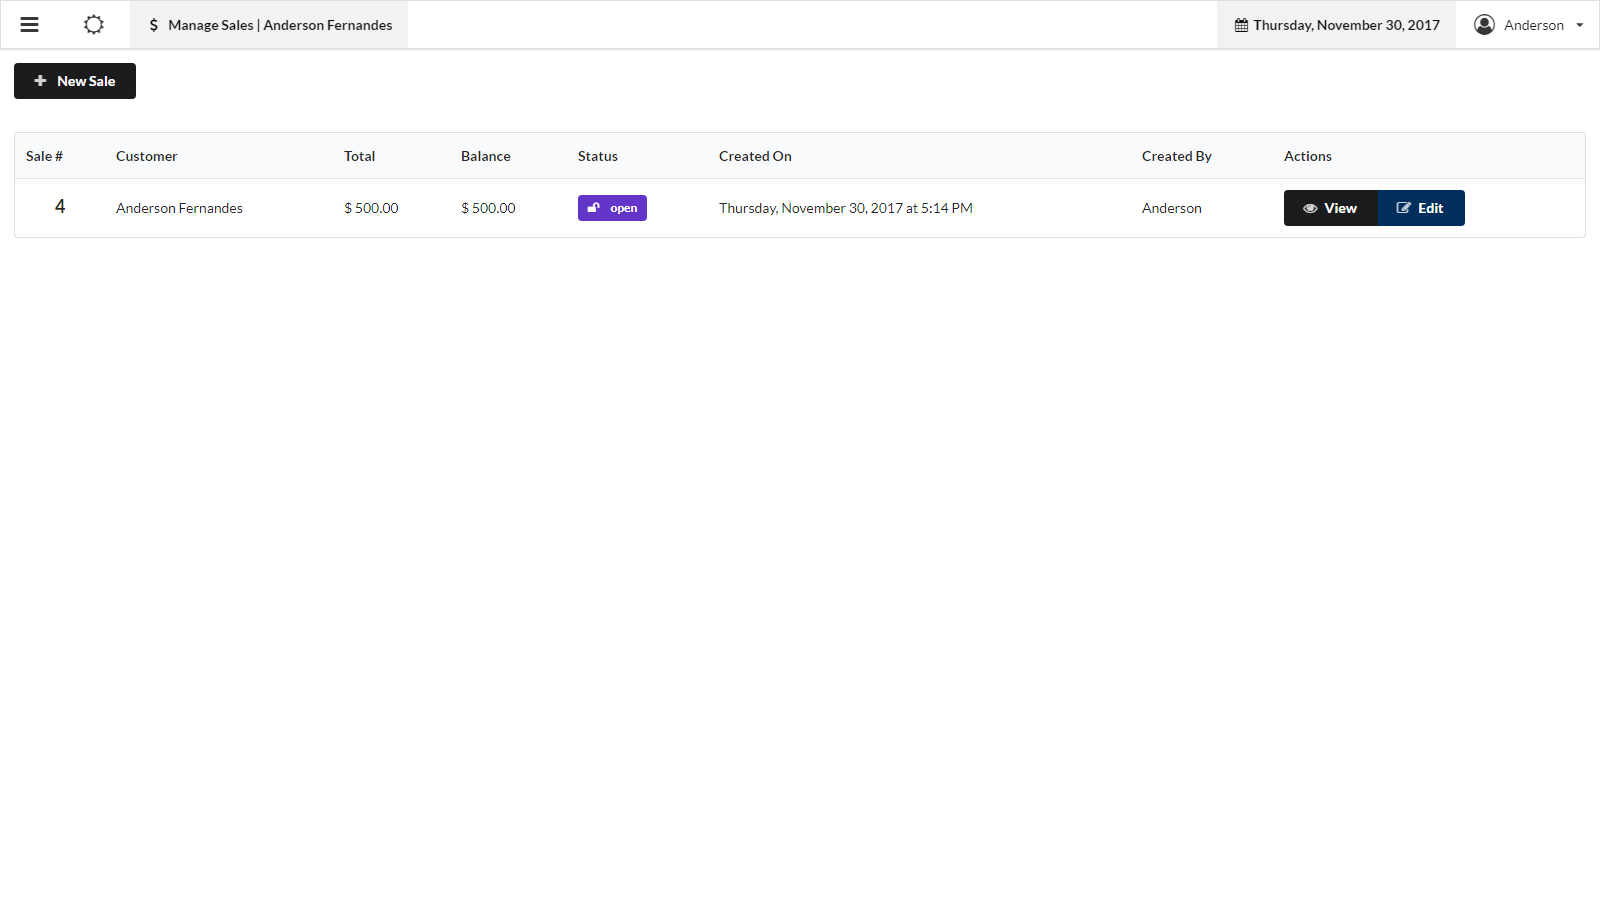
This is most likely the screen your organization will be using the most. This is where you will manage Sales.
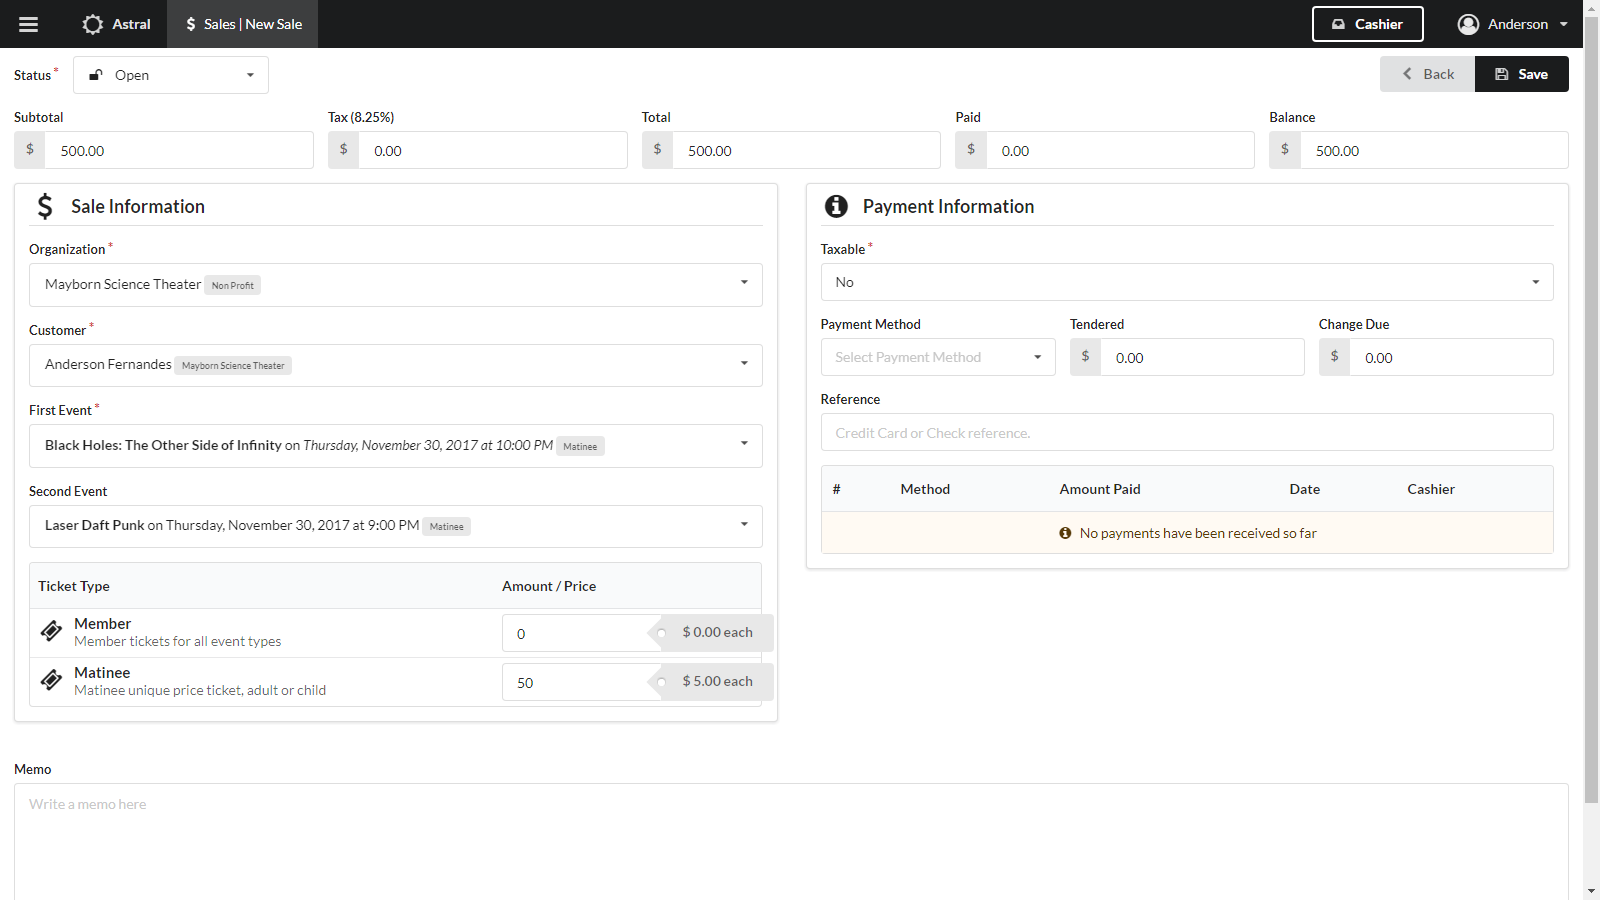
To create a new Sale, click in the New Sale button and fill out the form. You may add a payment if one is being made at the momemnt the sale is being created, or you can add payments later. Astral does support multiple payments in this screen, which means that your are able to take a partial payment such as a deposit or a down payment. Sales are automatically marked as complete is they have been paid in full.
To edit a Sale, click in the Edit button that corresponds to the Sale you want to make changes to. Once you are on the Edit screen, you can change anything, except payments that have been made.
The Edit Sale screen is very similar to the Create Sale one.
Find the Sale that is going to be paid for, click the Edit button that corresponds to it and fill out the Payment part of the form. This screen does support deposits, down payments and multiple payments. Enter the amount, the method and a reference.

The Members area of Cashier will assist you in adding your non-profit’s members to the system so you can track and offer the benefits of a Membership.
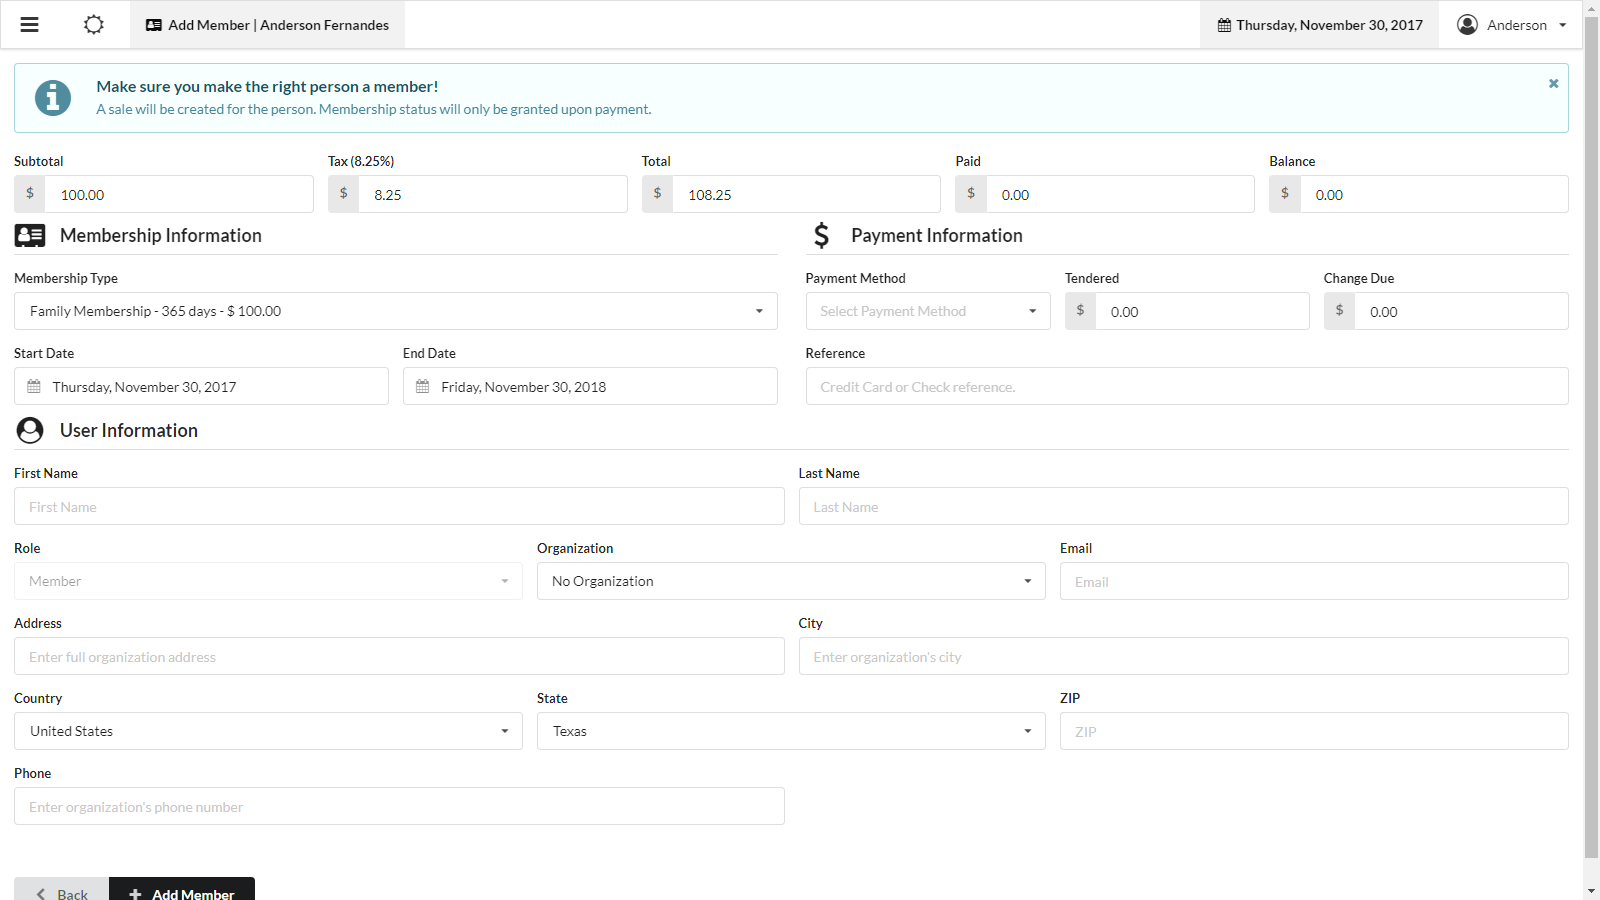
Click on the Add Member icon and fill in all their information. Select the membership package and take their payment. This will create an account for this particular user and make this user a Member, in opposition to what happens in Admin, where you have to do each action separetely.
When you click on the blue “view” button, you will be able to access detailed information on that member.
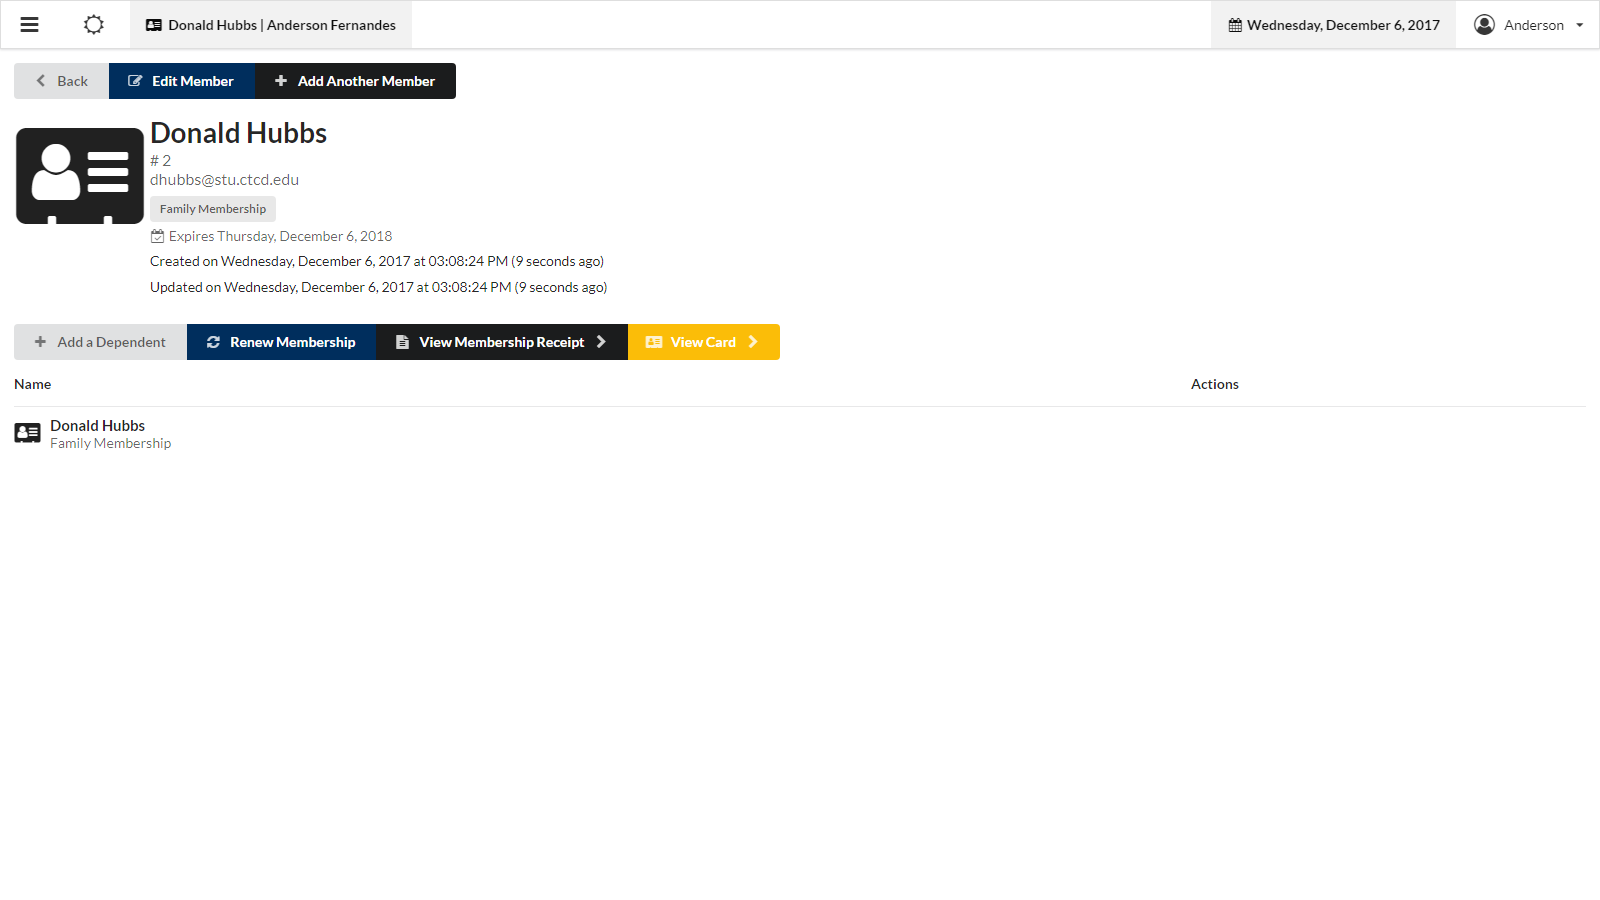
From there, you may Add a Dependent, Renew Membership, View Membership Receipt and View Membership Card
In the view member screen, click in “Add a Dependent”. A pop up will take the screen asking you who to add as a dependent. Select a person from the dropdown list or type the person’s name and click in “Add Dependent”.
On the member view screen, click in “Renew Membership”. Select the type of membership accordingly and fill out the rest of the form.
After adding someone as a member, you can view and print the membership receipt by clicking in the View Membership Receipt button. The receipt will be open in a new tab. The receipt will show all information relative to the membership such as cost, expiration date, etc. You can click in the blue button with a printer icon to print it or you can close return by clicking in the button with an “X” or closing the tab.
In the Member Information screen you can click in the yellow “View Card” button to see a member’s membership card. This may be your organization’s official membership card or just a temporary one.